![GUNPRIMER - Gate Remover Set [Starter Kit]](/web/image/product.product/3842/image_1024/%5BGP-R-GRS%5D%20GUNPRIMER%20-%20Gate%20Remover%20Set%20%5BStarter%20Kit%5D?unique=7b85f58)


![GUNPRIMER - Gate Remover Set [Starter Kit]](/web/image/product.product/3842/image_128/%5BGP-R-GRS%5D%20GUNPRIMER%20-%20Gate%20Remover%20Set%20%5BStarter%20Kit%5D?unique=7b85f58)


Gate marks are something every builder deals with, and for a long time the standard answer was a multi-step sanding process that ate up a lot of time and still left room for things to go wrong. The Gate Remover Set is Gunprimer's answer to that. It's their all-time best seller for a reason: it takes what used to be a tedious multi-grit process and turns it into three clean steps with three dedicated tools, each doing a specific job.
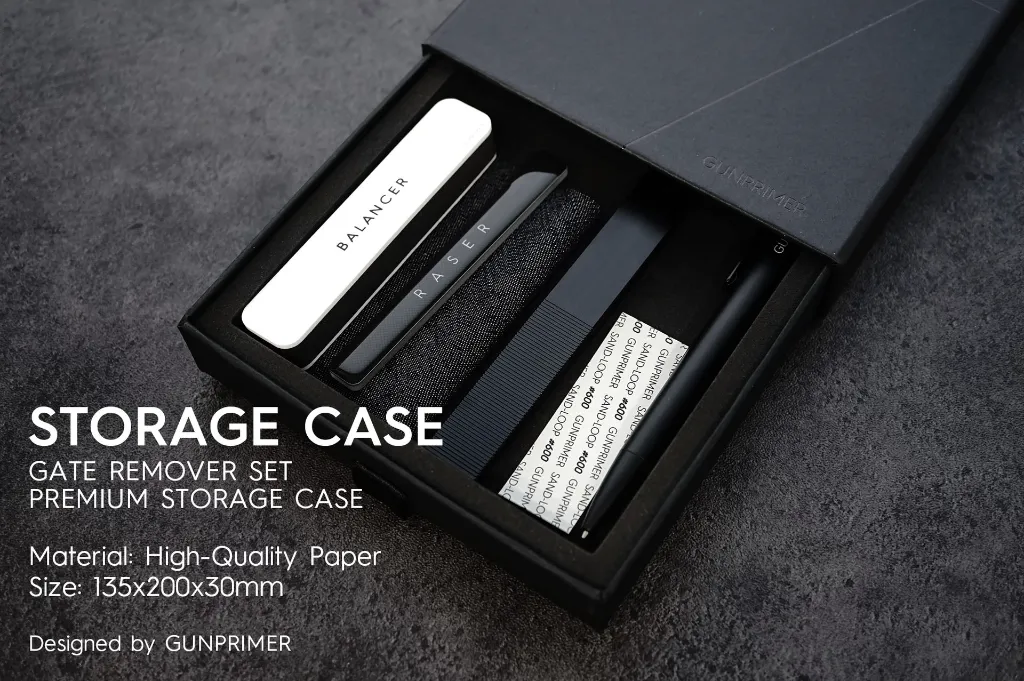
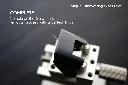
What's in the box:
The set includes four things. The Raser Origin, which is the glass file that starts everything. The Balancer White, which handles surface leveling and gloss adjustment. The Recover, a finish cloth that restores the plastic's natural sheen. And a reusable storage case that's big enough to hold all three tools plus extras once you remove the foam insert.
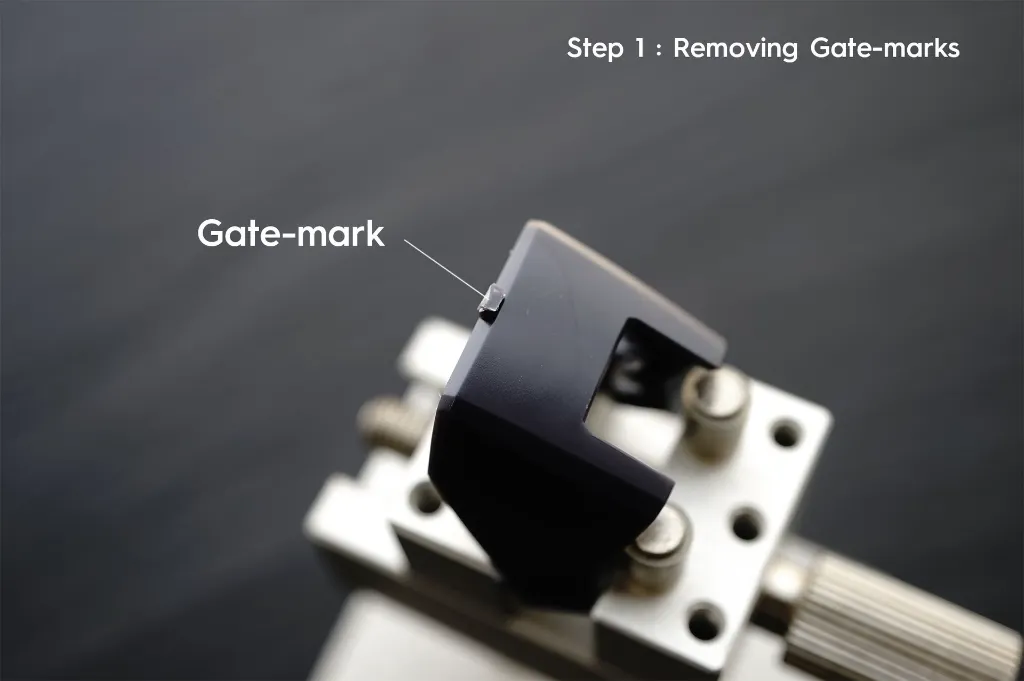
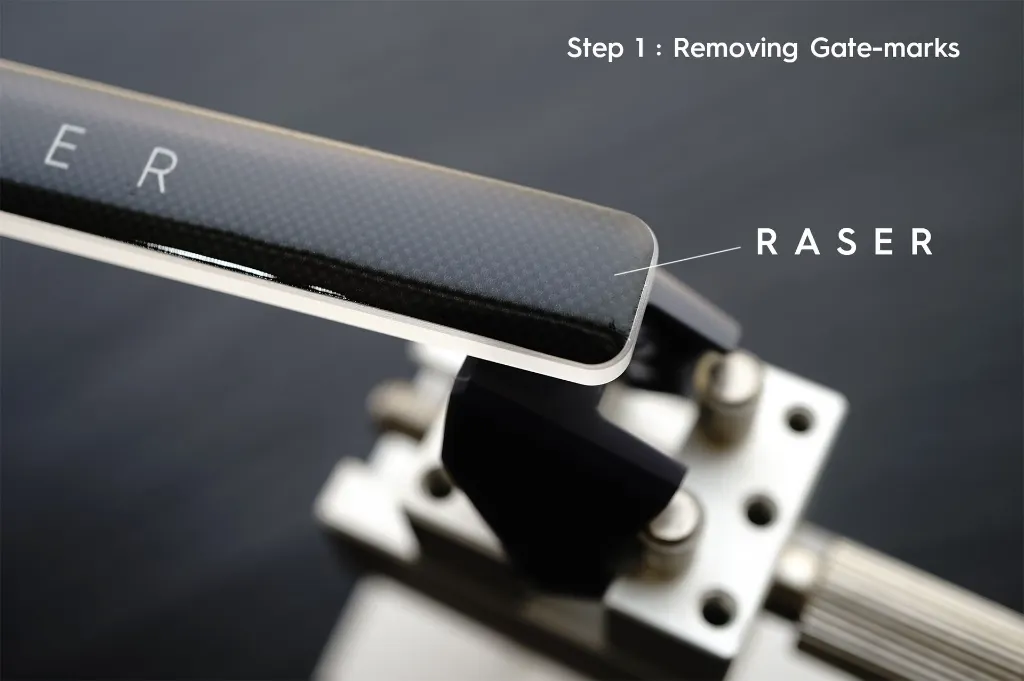
How it works, step by step:
Step 1 is the Raser Origin. This is a tempered glass file built with Gunprimer's Super-Nano technology. What makes it different from a regular glass file is that despite its aggressive cutting power, it leaves the surface smooth and slightly glossy rather than scratched up. Regular files at similar cutting strength tear at the plastic and leave marks behind that need several more sanding steps to fix. The Raser removes the gate mark cleanly and leaves the surface in good enough shape to go straight into the Balancer, skipping a lot of the intermediate grit work entirely. The edges are also handcrafted and rounded, so even if your sanding angle drifts a bit, the surrounding plastic stays intact.
Step 2 is the Balancer White's green side. After the Raser does its job, the treated area sits at a different gloss level than the rest of the part. The green side of the Balancer knocks that back down to matte, evening everything out and prepping the surface for the final step.
Step 3 is the Recover. This is a functional twill weave cloth that brings the surface back to the plastic's original semi-gloss finish. A few passes over the matte surface from Step 2 and the whole area looks like nothing happened. This is the step that makes the biggest visual difference, especially if you're doing a straight build without paint or topcoat.
A couple of practical notes worth knowing: on clear parts, you can skip Steps 2 and 3 entirely and just use the Raser on its own. And if you want a full gloss result instead of semi-gloss, swap the Recover for the white side of the Balancer after Step 2.
Maintenance matters across all three tools. Clean the Raser and Balancer with masking tape or water after each session, and make sure the Raser is completely dry before using it again. Store the Raser in the case when it's not in use since the tempered glass, while durable under normal use, can crack from drops or hard impacts. Also, these tools are plastic only and should never be used on metal parts.

To install this Web App in your iPhone/iPad press
![]() and then Add to Home Screen.
and then Add to Home Screen.
